


Ready
to Begin!
The following 3-step instructions will guide you step-by-step through the
plastic casting process:
Playing with Plastic (prerequisite: Mold-making Tutorial)
Once you have a flexible mold of an object, you can easily reproduce the object
using any of various liquid plastic/resin compounds available commercially.
As in the Mold-making Tutorial, the process below is shown using products
from www.smooth-on.com.
Their products are available individually or--for beginners--as all-inclusive
starter kits. The recommended kit for this tutorial is Smooth-On's
Pourable
Silicone Starter Kit (U.S. $49.99) whic contains the
following:
- Oomoo 25 liquid mold-making rubber
- Smooth-Cast 300 liquid plastic resin for casting
- Ease Release 205 mold release agent
- SuperSeal sealer for pourous surfaces
- "How-to" materials
| SAFETY
FIRST!!! Mold-making & casting can be a fun hobby, but remember that you are working with chemicals. Please take the time to read all MSDS (Material Safety Data Sheet) information provided by the product manufacturer and take all possible safety precautions. |
 |
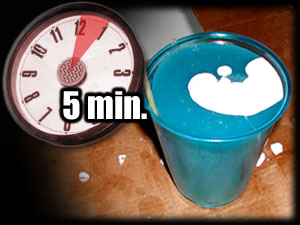
| The thicker your plastic is poured, the quicker it will harden. For Mego-sized head casts, allow about 5 minutes for the plastic to cure completely. Then, remove your mold from the containtment cup. |
 |
 |
 |
STEP 2: POUR YOUR CAST |
| Now you're ready to mix the liquid plastic compound to pour into your mold! Before you continue, note that Smooth-On's SmoothCast 300 liquid plastic compound Part A (Yellow Label) contains methyl diphenyl diisocyanate which, among other things, can cause severe skin irritation. Cured to its solid state, the plastic is safe to handle, but while handling the plastic in its liquid form, I strongly recommend wearing latex or vinly disposable gloves. |
| STEP
1:
PREPARE YOUR MOLD
*Use
of Ease Release is not necessary when using silicone-based rubber such
as Oomoo.
Coat the inside of your mold with Ease Release 205 or universal mold release. This will prevent the liquid plastic from bonding to your mold. This step is important only when using urethane molds such as Smooth-On's Evergreen or Reoflex products. If you are using Oomoo or any other silicone mold, you can skip this part of Step 1 |
| Like the mold rubber, the two-part liquid plastic is a 1 to 1 by volume mix ratio, so pour equal amounts of parts A & B into each of the two cups. Pour enough of each so that, when combined and poured into the mold, the total amount of liquid plastic will completely fill the mold cavity. |
| Compare the cups side-by-side, taking your time to measure carefully. But not TOO long... eventually, 'Part A' will begin to dissolve the plastic cup! You can be casual about measuring--just don't go mow the lawn! |
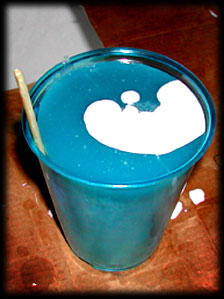
| When you have measured equal parts, mix parts A & B together in one cup. |
| Using a plastic fork, stir for briefly (10 seconds or less). Smooth-Cast 300 has a pot life of only 3 minutes, so don't spend too long stirring--you'll need the time for pouring! |
| Finally, pour the mixed liquid plastic into the mold. To reduce the occurrence of bubbles, pour the plastic VERY SLOWLY in a THIN stream. The liquid plastic will get warm as it begins to chemically harden -- If you feel this happening don't worry, you still have a little time before it hardens so don't rush the pouring. |
| STEP 3: DEMOLD YOUR PLASTIC PIECE |
| Peel off and discard any extra overpoured plastic. This extra plastic is called "flash". |
| Now you have a solid plastic resin cast--an exact duplicate of your original part. This cast is ready to be sanded, drilled, painted and finished! |
 |
 |
 |
 |
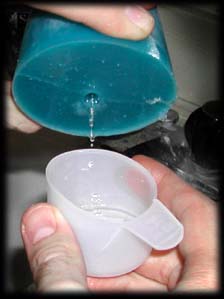
| With a steady hand, you can pour directly from the bottle into the mold's pour hole--or you could use a small funnel. In these photos, I use a soft plastic cup as a "go-between" in place of the funnel. |
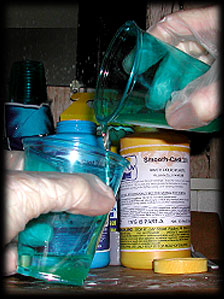
| Urethane mold users: When applying the release agent, DO NOT use the spray pump that comes with it, as the spray is very ineffective and wasteful. Instead, complete coverage is achieved best by pouring an amount of mold relase directly into your mold through its "pour hole" (created by the wooden dowel in the mold-making tutorial). |
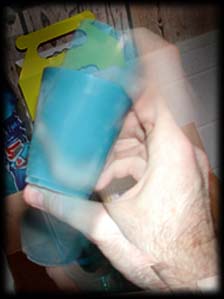
| Cover the pour hole with your finger and rotate the mold in all directions, making sure the mold release inside gets into all the crevices and detail of your mold. |
 |
 |
 |
| When finished, pour the excess release agent back into the bottle and replace its cap. Again, this is shown using a cup, but you may use a funnel or pour directly from mold to bottle. Also, make sure that some of the excess mold release coats the top of your mold--the part surrounding the pour hole. |
 |
 |
 |
 |
| * Now, allow a minute or two for the release agent inside your mold to dry, then move on to STEP 2. * |
| Replace the mold into its containment cup. Use a new one if you cut the original containment cup while demolding your prototype piece. (STEP 5, mold-making tutorial) |
| If the cup does not hold the mold snug... |
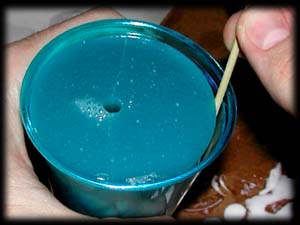
| ...use a toothipick or chopstick as a wedge to seal the split part of the mold together. |
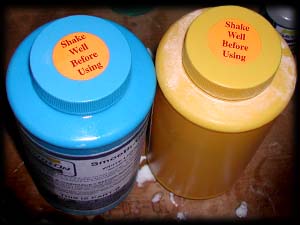
| ...follow the "Shake Well" instructions on the liquid plastic bottle(s). |
 |
 |
 |
| Grab two more plastic cups identical to your containment cup and... |
| While "shaking well", you might want to cover the bottle lids with scrap cloth or paper towels to prevent any accidental spilling or leaking. Prevention is easier than clean-up! |
 |
 |
 |
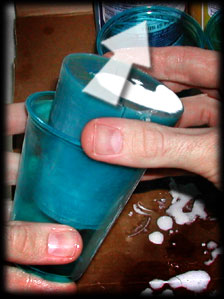
| Fill the mold completely to the top of it's pour hole. If you wish, you can give the mold a gentle squeeze or a few taps to push out any possible trapped air bubbles, but this is generally not necessary. |
 |
| In minutes you will see the plastic transform from a clear viscous liquid... |
| ...into a bright white solid resin. |
 |
 |
 |
 |
| Hold the mold open and work the plastic piece free of the mold cavity. |
 |
| Customizer's Start-to-Finish Tutorial Guide: |
| Plastic Casting |
| Once free of the mold, rinse your new cast under tap water to remove any mold release residue. |